
How To Load a Bike to your Roof Rack
September 25, 2023
For those passionate about cycling, if you’re seeking a more efficient and fashionable means of transporting your bike, you’re in for a treat. By securely attaching your bike to the roof of your car or truck, you can effortlessly bring it along on your journeys, eliminating the need to physically transport it.
And if you have concerns about weather conditions, rest assured—roof racks are designed to withstand various weather conditions. So, why hesitate? Give this straightforward and convenient approach a shot and experience how effortlessly you can transport your bike with a touch of style.
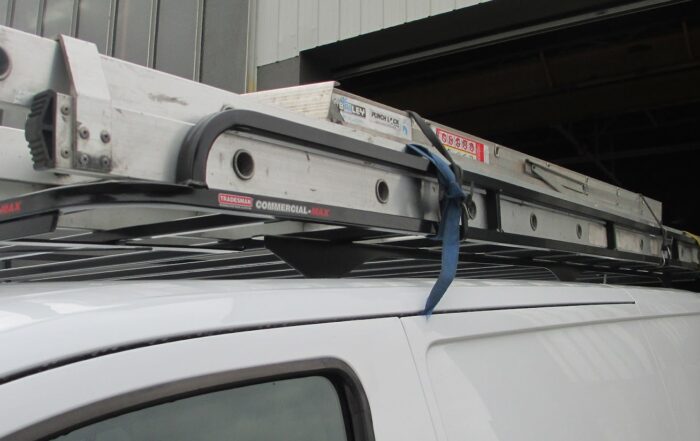
How to Choose the Best Roof Rack for Your Bike
Selecting the appropriate roof rack for your bicycle may appear to be a challenging decision. Several factors must be taken into account, such as your bike’s model, its weight, and the dimensions of your vehicle.
Here are some pointers to assist you in making the optimal choice for your bike rack:
When considering bike transport, obtaining a rack that precisely matches the dimensions of your vehicle and bicycle is vital. To ascertain the necessary space, you’ll need to measure both the bike and the rack accurately.11
It’s crucial to verify that the rack can adequately support the weight and securely fits onto your car’s roof. Whether you’re transporting bikes from your home or workplace, always employ a carabiner or lock as a precautionary measure to prevent any potential problems. This practice will guarantee their safety at all times.
1. Determine How Many Bikes Can Be Safely Loaded on the Rack
When it comes to loading bicycles onto a bike rack, it’s crucial to take into account the safe load capacity for the number of bikes. Ensure that the selected rack can support the weight of your bike and any additional cargo.
Furthermore, verify the compatibility of the bike rack with the roof style of your car or truck, ensuring it fits securely. Lastly, assess the necessary clearance from the edges of your roof to allow your vehicle to comfortably fit into parking spaces.
2. Choose a Quality Rack That Will Last
When selecting a bike rack, it’s essential to take into account both the weight and dimensions of your bike. A suitable rack should have the capacity to securely accommodate your bike and handle its weight, both in the front and rear.
Furthermore, it’s crucial to employ a safety chain or cable when loading or unloading your bike to prevent any accidents while cycling.
3. Choose the Width and Height of Your Rack
Regarding bike racks, there are specific considerations to keep in mind. The rack should have a width exceeding your bike’s tire by two inches and a height surpassing your seat tube by one inch. Furthermore, it should have the capacity to bear a maximum load of 100 pounds.
Additionally, it’s essential to verify that the rack is compatible with your vehicle’s roof system, avoiding any selection that might result in leaks while driving.
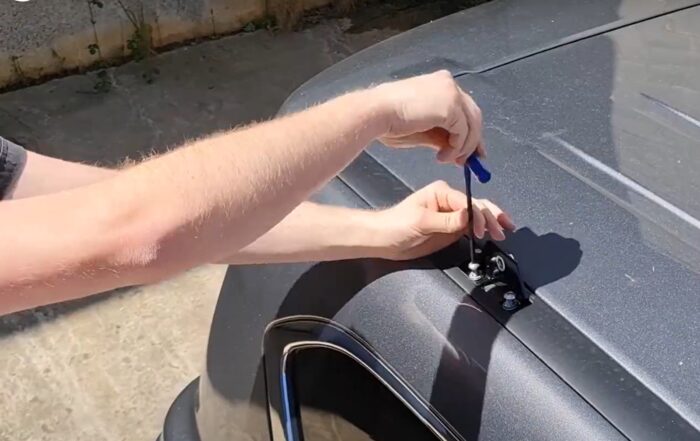
4. Bike Installation On a Roof Rack
Installing a bike on a roof rack can be a bit challenging, so it’s crucial to meticulously adhere to the provided instructions. The recommended approach is to use zip ties to secure the wheel. Afterward, position the bike in an upright position and fasten it securely using bungee cords or belt straps.
Lastly, firmly secure the bolts that anchor your rack to the car’s roof. It’s essential to carefully read and adhere to the manufacturer’s installation instructions, as each roof rack varies. With this done, you’re all set to embark on your journey and enjoy cycling to your heart’s content.
5. Select the Right Bike Rack
Bike racks are available in various forms, dimensions, and weights, making it crucial to select the suitable one for your specific vehicle. Before deciding on a bike rack for your car, ensure its compatibility with your vehicle.
Given that various car models possess differing roof rack capacities, it’s essential to verify this information before making a purchase. Once you’ve confirmed compatibility, assess which size option aligns best with your needs and your bike.
6. Secure Your Bike With Straps
Ensuring the security of your bike on a bike rack is crucial to its safety. A bike that is properly secured to the rack reduces the risk of theft and potential damage in case it dislodges from the rack.
A wide variety of strap options are accessible in the market, so it’s essential to pick the ones that are suitable for both your bike and rack. Typically, the initial tightening should be done with the front wheel and seat post straps, followed by those securing the rear wheel.
7. Adjust the Height of the Rack to Suit Your Vehicle
Ensuring a secure bike installation on the roof of your car may seem challenging, but with straightforward measurements and installation advice, it can be achieved smoothly!
Begin by measuring the height of your vehicle; this will determine the ideal placement height for your bike on the rack. Once this measurement is established, make the necessary adjustments to the rack to ensure a precise fit.
8. Preparing Your Bike for Installation
Here are some simple steps to instal your bike on the roof rack:
- Verify your bike’s condition – it should be devoid of dents, scratches, or any damage.
- Remove the front wheel, pedals, and seat – these components can obstruct the installation process when placing the bike on top of the roof rack.
- Position your bike in a manner where both wheels align directly with the mounting points on the roof rack (be sure to verify clearance before placement).
9. Carrying Bikes on a Roof Rack
Here are some pointers for transporting bikes on a roof rack:
- Ensure that you secure the bike in a way that allows the front wheel and seat post strap to tighten initially.
- Proceed to tighten the straps around the rear wheel and handlebars. This step aids in preventing any wobbling of your bike during your journey.
- With these steps completed, you’re all set to proceed. Lift your bike onto the roof rack gently, placing one hand on the saddle and using the other hand for support.
- After positioning it correctly, make sure to tighten any remaining straps and wheel mounting points before setting off on your journey.
Most Recent Posts
How to install a Tradesman Roof Rack
Jonah Samuel2024-06-24T14:48:57+10:00June 24, 2024|
Specialists in roof racks for Toyota vehicles
Jonah Samuel2024-06-24T16:02:25+10:00May 23, 2024|

Top 5 Victorian High Country 4WD Tracks
Jonah Samuel2024-05-07T16:25:59+10:00May 7, 2024|
Why roof racks make noise and how to prevent it
Jonah Samuel2024-03-26T20:13:13+10:00March 26, 2024|
Everything you need to know before buying roof racks
Jonah Samuel2024-03-26T20:05:50+10:00March 26, 2024|
Customisation Options for Roof Racks
Jonah Samuel2024-03-01T16:10:30+10:00March 1, 2024|